
Go Back

Homemade Cultured Butter

Donnie
Based on the fermented cream method documented in Ye Gentlewoman’s Housewifery by Margaret Huntington Hooker, 1896, updated for a hand mixer rather than a butter churn
The fermented cream step in this recipe recreates the traditional pre-refrigeration method that produced what we now call cultured butter, which was simply standard butter before refrigeration changed dairy farming in the late 19th century
Makes: approximately ½ lb butter plus 1 cup fresh buttermilk
Prep Time 30 minutes
Fermenting Time 12 hours

Jump To

Donnie Dodson

Don’t lose this one.

I’ll email it to you so it’s waiting when you’re ready to cook.

Ingredients
  

  • 2 cups heavy cream full fat, the best quality you can find. The quality of the cream is the entire recipe
  • 2 tbsp plain whole milk yogurt with live active cultures. This is the fermentation starter that introduces the lactic acid bacteria responsible for cultured butter’s complex flavour. Do not use Greek yogurt which is too thick and too acidic
  • ½ tsp fine sea salt added at the end

Instructions
 

Ferment the cream

  1. Combine the heavy cream and yogurt in a clean glass jar or bowl. Stir gently to incorporate. Cover loosely with a clean cloth or lid set ajar, not sealed. Leave at room temperature, between 65 and 75 degrees Fahrenheit, for 6 to 12 hours. The cream will thicken noticeably and develop a faint, pleasant sour tang. This is the lactic acid fermentation beginning. A shorter fermentation time produces a milder cultured flavour. A longer fermentation produces a more pronounced tang. Both are correct depending on your preference. Do not ferment for more than 16 hours at room temperature.
  2. Refrigerate the fermented cream for at least 2 hours before churning. Cold cream between 50 and 60 degrees Fahrenheit is the ideal churning temperature. Cream that is too warm produces soft butter that does not separate cleanly. Cream that is too cold takes much longer to churn.

Churn with the hand mixer

  1. Pour the cold fermented cream into a large deep bowl. A deep bowl prevents splashing when the butter separates and the buttermilk releases suddenly. Beat on medium-high speed with a hand mixer.
  2. The cream will go through several clearly visible stages. First, whipped cream, thick and airy. Second, a dense, slightly grainy whipped cream that begins to lose its gloss. Third, a scrambled-egg-like yellow consistency will form as the fat globules begin to clump and buttermilk starts to release from the butter mass. This third stage happens suddenly and the buttermilk can splash, so reduce speed slightly as you approach it. Continue beating until the yellow butter mass is fully separated from the white buttermilk liquid and the butter is clumping around the beaters. This takes approximately 5 to 10 minutes total.

Save the buttermilk

  1. Pour off the buttermilk liquid into a clean jar and reserve it. This is real cultured buttermilk, noticeably better than the commercial version for pancakes, scones, biscuits and any recipe that calls for buttermilk. Do not discard it.

Wash the butter

  1. This is the step that determines how long your butter keeps. Inadequately washed butter retains buttermilk compounds that cause it to turn rancid quickly. The historical instruction to wash in three or four waters means three or four complete cold water rinses.
  2. Transfer the butter mass to a clean bowl. Add a cup of very cold water or ice water. Using clean hands or a wooden spoon, knead and squeeze the butter against the side of the bowl, working the cold water through it. The water will turn milky white as buttermilk releases. Pour off the milky water. Repeat with fresh cold water. Continue until the water runs completely clear, which typically takes three to four washes. The butter is now properly washed.

Salt and shape

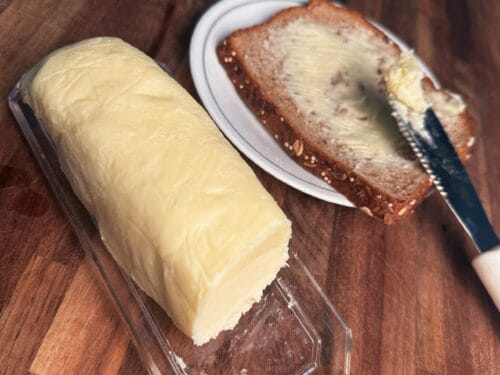
  1. Sprinkle the salt over the washed butter and knead it in thoroughly until evenly distributed throughout. Taste and add more if needed. The salt level is personal preference. Shape the butter into a log, block or any form you like. Wrap in parchment paper and refrigerate.
  2. Properly washed homemade butter keeps refrigerated for 2 to 3 weeks. Frozen it keeps for 6 months.

Notes

  • The yogurt fermentation step is optional if you want sweet cream butter instead of cultured butter. Skip it and simply use cold fresh cream straight from the refrigerator. The churning method and washing steps remain the same. The flavour will be cleaner and milder, closer to standard commercial sweet cream butter.
 
  • The temperature of the cream going into the mixer is the single most important variable in the recipe. Too warm and the butter forms slowly and the texture is greasy. Too cold and it takes much longer than necessary. Around 55 to 60 degrees Fahrenheit is the ideal, which for most refrigerators means taking the cream out 20 to 30 minutes before churning.
 
  • The real buttermilk that comes off during churning is thinner and more liquid than commercial buttermilk and is better in every baking application. Use it immediately or refrigerate and use within a week.
 
  • The compound butter applications are where this recipe genuinely earns its place over commercial butter. After salting, incorporate roasted garlic and thyme for a steak butter, or honey and flaky sea salt for a breakfast butter, or blue cheese and chives for a burger butter, before shaping and wrapping. These versions genuinely cost less to produce at home than the equivalent commercial product and taste noticeably better.